


Description
Price: $209.99 - $37.99
(as of Jan 18, 2025 13:51:50 UTC – Details)

Product Description
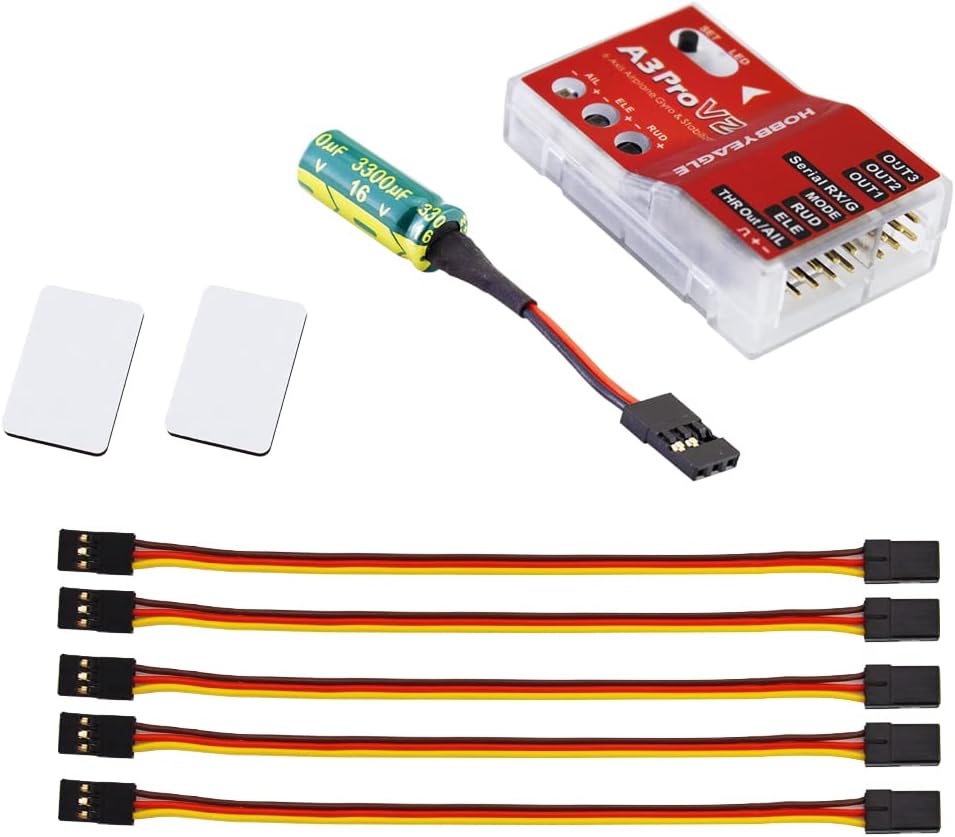
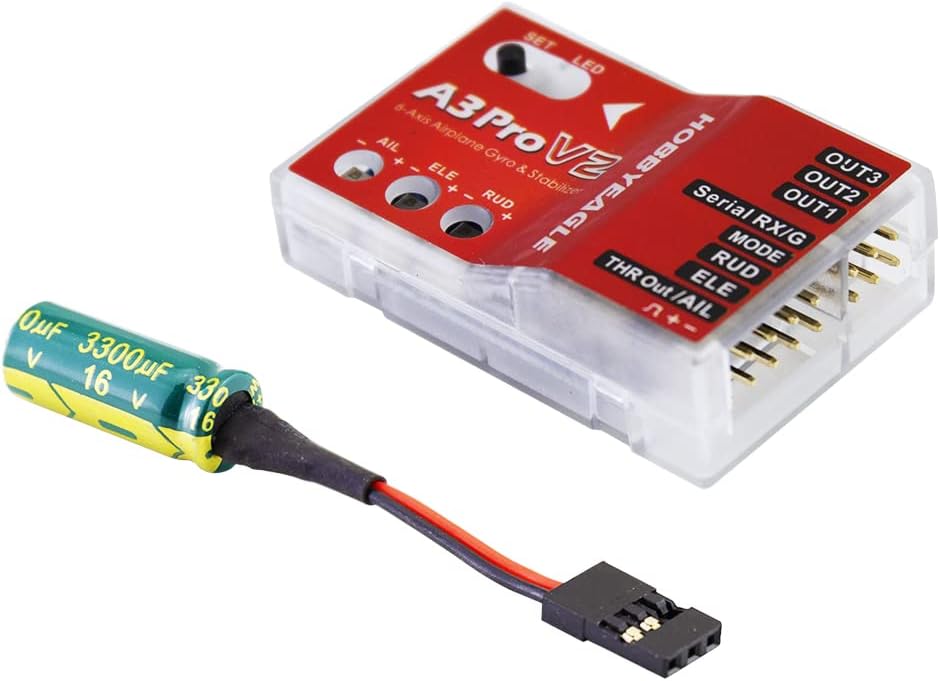
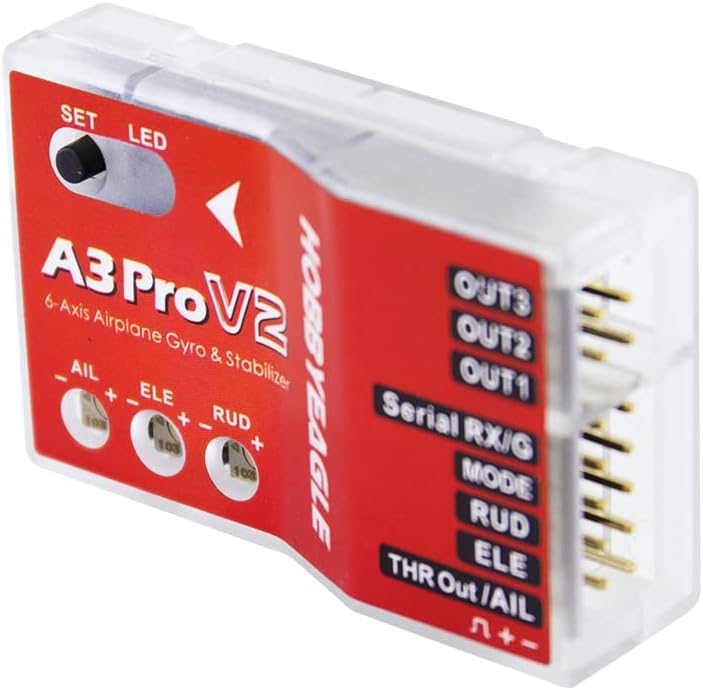
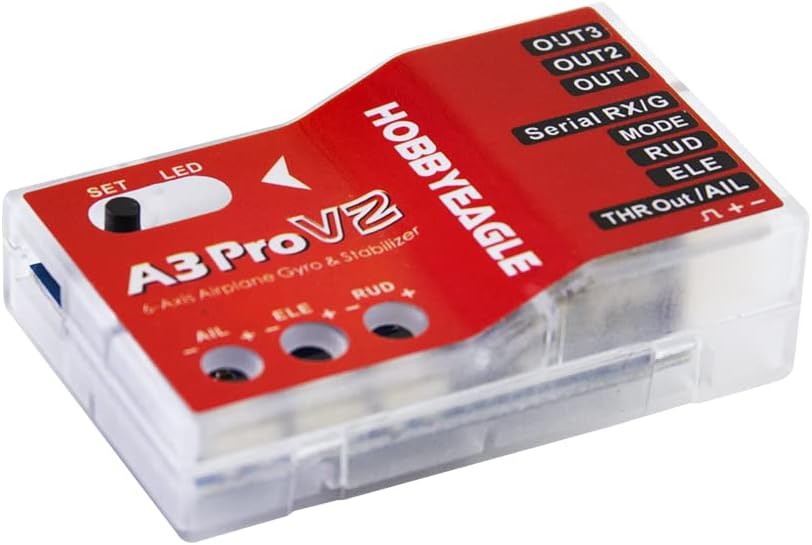
The new A3 Pro V2 is a high-performance and functional 6-axis gyro and stabilizer designed for R/C airplanes. With the advantage of multi-protocol serial receivers support, it allows you to simplify the connection of the receiver
Features:Compatible with most standard PWM receivers, PPM and multi-protocol digital serial receivers.32-bit MCU, high-precision 6-axis MEMS sensor, improved hardware platform and new firmware solution provide more reliable performance.6 flight modes, including GYRO OFF mode, NORMAL mode, LOCK mode, ANGLE mode, LEVEL mode and HOVER mode.3 wing types: standard fixed-wing, delta-wing(flying-wing), v-tail.Separated basic gain adjustment for Aileron, Elevator and Rudder.Remote master gain supported.Firmware upgradable (an optional data cable is required).
Serial Receiver Protocols Supported:
PPM ReceiverFutaba S.Bus (compatible with FrSky SBUS, RadioLink SBUS and WFLY WBUS)Spektrum DSM/DSMX 1024 Satellite ReceiverSpektrum DSM/DSMX 2048 Satellite ReceiverSpektrum SRXLMultiplex SRXL / JR XBUS Mode BGraupner SUMDFlySky iBus

Standard PWM Receiver Connection
Notes:[MODE] is used for flight mode switching of the gyro, connect it to a 3-way switch channel of the receiver to switch the flight mode in flight.[Serial RX/G] is used for remote master gain adjusting, connect it to a proportional channel of a volume or slide lever of the transmitter to tune the master gain in flight.The ESC or throttle servo is connected to the throttle channel of the receiver directly without passing through the gyro.Pay attention to the polarity of the plugs. The orange signal line must always be on the top and the brown on the bottom.

Single-line Receiver Connection
A3 Pro V2 supports PPM and multi-protocol digital serial receivers which allows you to connect the gyro to the receiver with one single wire. When using a specific type of these receivers the appropriate type of receiver channel allocation will be preset in the A3 Pro V2. Please check if your radio transmits the channels in the correct order. If this is not the case, you have to change the channel mapping in the Receiver Menu. If you use a standard PWM receiver with standard wiring layout the channel mapping does not apply.When A3 Pro V2 is operating in single line receiver mode, the [THR Out/AIL] can be used as the throttle output channel for the ESC or the throttle servo if a mini receiver is being used which has no additional output connectors.
Notes:Please note that the remote master gain channel is disabled in single line mode as default. Assign a channel number for gain channel in Receiver Menu to activate this feature if needed.Pay attention to the polarity of the plugs. The orange signal line must always be on the top and the brown on the bottom.You will need to purchase an optional adapter if you are using a Spektrum satellite receiver.

Spektrum Satellite Receiver Connection
If you are going to use a Spektrum DSM2/X satellite for A3 Pro V2, a DSM Adapter [HEDSMADP] is required to make the connection between the satellite and the gyro.

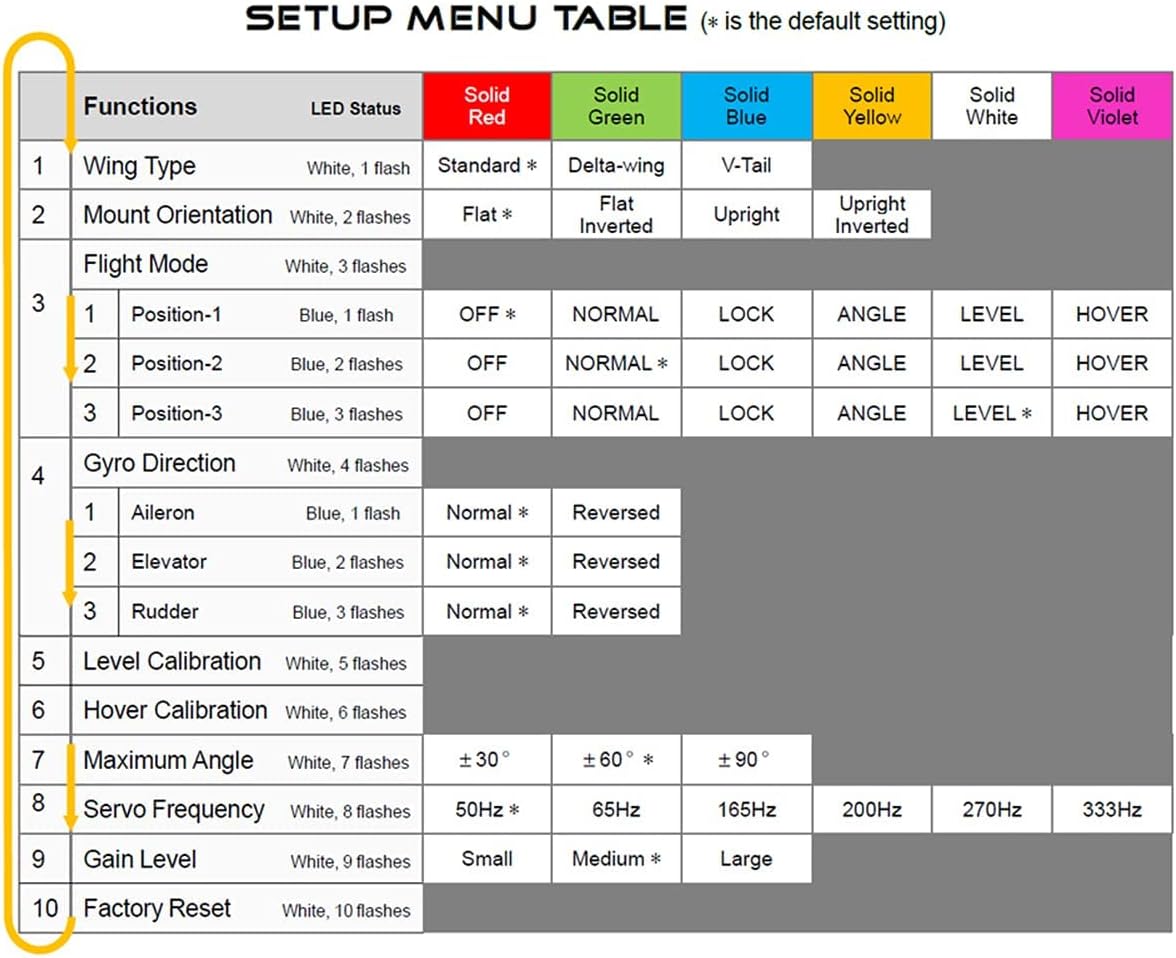
Setup Menu
Menu AccessingTo get into the Setup Menu, press and hold the button for about 2 seconds until the LED starts flashing White quickly. The Setup Menu contains 10 setting functions which normally only need to be setup once after installation.
Function SelectionIn the Setup Menu, the LED will flash White several times every 3 seconds in a loop and the number of times LED flashes shows at which function item you are currently. For example, one White flashing means the first setting “Wing Type”, after waiting about 3 seconds, a twice White flashing means the second setting “Mount Orientation”, and so on.
Option SwitchingWhen you reach the function that you wish to operate in, short press the button to get into it. After entering in, the current selected option is indicated by the color of the LED. Each short press of the button advances the option to the next value. After you finish making your selection, just wait for 5 seconds until the LED starts blink quickly which indicates that the modified is saved and then you will be brought back to the Setup Menu level automatically. If you do not want to change anything, just wait for timeout without any operation.
Exit of MenuTo exit the menu keep the button pressed for 2 seconds again until the LED starts flashing White quickly.

Receiver Menu
Menu AccessingTo get into the Receiver Menu, press and hold the button while turn on the power supply of the gyro, release it when LED lights solid Violet. In Receiver Menu you can change the receiver type and program the channel mapping for single line receivers.
Function SelectionIn the Receiver Menu, LED will flash Violet several times every 3 seconds in a loop and the number of times LED flashes shows at which function item you are currently. For example, one Violet flashing means the first setting “Receiver Type”, after waiting about 3 seconds, a twice Violet flashing means the second setting “Aileron channel”, and so on.
Option SwitchingWhen you reach the function that you wish to operate in, short press the button to get into it. After entering in, the current selected option is indicated by the color of the LED. Each short press of the button advances the option to the next value. After you finish making your selection, just wait for 5 seconds until LED starts blink quickly which indicates that the modified is saved and then you will be brought back to the Receiver Menu level automatically. If you do not want to change anything, just wait for timeout without any operation.
Exit of MenuTo exit the menu just keep the button pressed for 2 seconds again until the LED starts flashing Violet quickly. After exiting the Receiver Menu, the gyro will start the initialization normally, so the new receiver settings will take effect immediately without restarting the gyro.

Specification:Main Controller: 32-bit MCUSensor: High-precision MEMS 6-axis sensorGyroscope Scale Range: ±2000 dpsAccelerometer Scale Range: ±4gPWM Output: 920uS to 2120uS with 1520uS center length, 50Hz to 333HzInput Voltage: 4.8V to 8.4VOperating Temperature: -10 ℃ to 50 ℃Size: 43x27x14mmWeight: 10g (excluding wires)
The new A3 Pro V2 is a high-performance and functional 6-axis gyro and stabilizer designed for R/C airplanes.
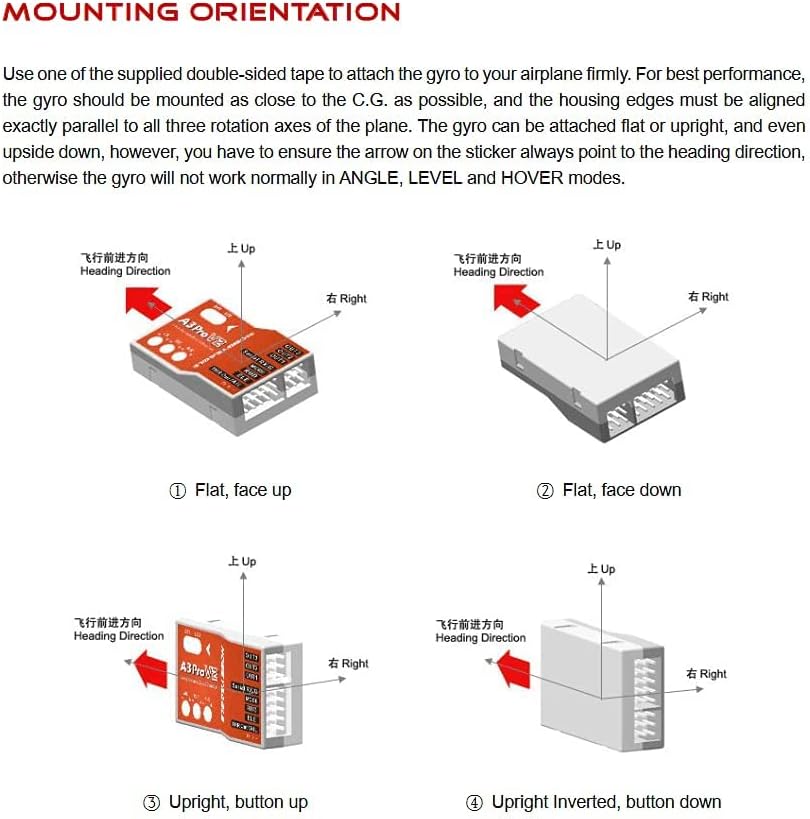
This gyro can be used with nearly any size and type of R/C airplanes and it will make the flying even easier and comfortable
32-bit MCU, high-precision 6-axis MEMS sensor, improved hardware platform and new firmware solution provide more reliable performance
6 flight modes, including GYRO OFF mode, NORMAL mode, LOCK mode, ANGLE mode, LEVEL mode and HOVER mode
3 wing types: standard fixed-wing, delta-wing(flying-wing), v-tail
Compatible with most standard PWM receivers, PPM and multi-protocol digital serial receivers,Firmware upgradable
(an optional data cable is required)
Customers say
Customers are satisfied with the product’s functionality. However, opinions differ on installation.
AI-generated from the text of customer reviews


")

Reviews
There are no reviews yet.